
Seeing What Matters: A Selective Attention Mechanism for Image Restoration
Published:
What if your model could tell apart noise from meaningful features even before it starts paying attention?
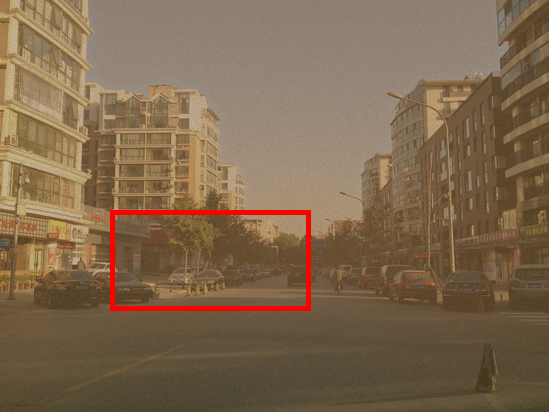
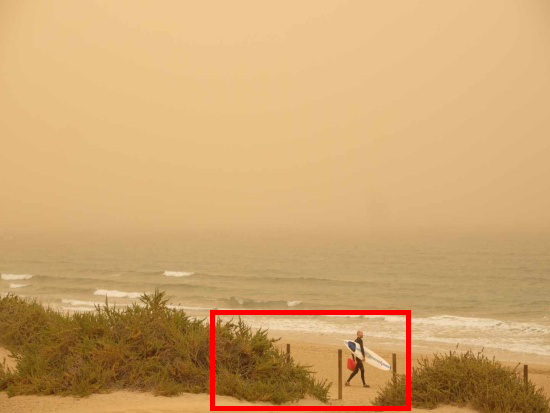
Have you ever taken a photo during a dust storm only to end up with a blurry, yellowish mess?
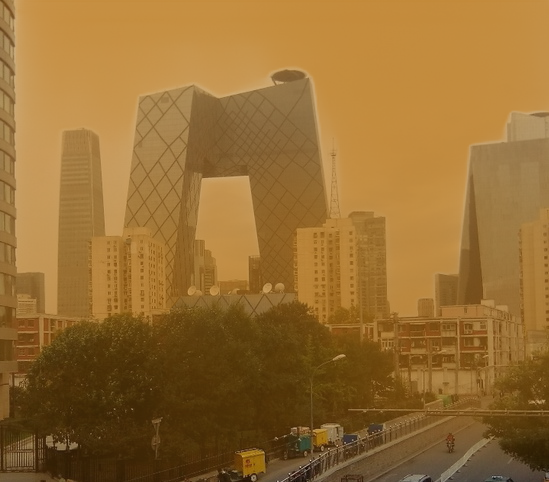
A picture affected by sand-dust — hard to see details, right?
That’s the challenge I’ve been working on. I’ve developed a technique that helps a deep learning model clean up dusty, unclear images — restoring sharpness, structure, and color, even when everything seems lost.
Let me explain.
Why Dusty Photos Are So Hard to Fix?
Photos taken in sand-dust conditions suffer from:
- A yellow fog covering everything
- Loss of sharpness — edges become soft
- Tiny particles that look like static or grain
- Loss of details
And when you try to restore these photos, it’s hard for the model to figure out what’s noise and what’s actually part of the scene. Imagine trying to clean a dusty painting without knowing which parts are dust and which are brushstrokes.
Dust hides real details under layers of noise.
How Model “Sees” Images (Hint: Not Like Us)
Most models “see” images as a giant grid of pixels. They scan for familiar patterns like shapes, edges, and color transitions — to understand what’s in the picture.
But here’s the catch:
In a sand-dust-degraded photo, the important details and the noisy dust are tangled up in the same spots.
So, what happens? The model might:
- Sharpen the dust instead of the object (oops, now that grainy mess looks even crisper!)
- Brighten areas that are already washed out (making the blur worse)
- Mistake noise for texture, and ignore actual structure
It’s like giving glasses to someone but smudging the lenses before they put them on. You’re technically “enhancing” vision but not in a helpful way.
Without the right guidance, the model can accidentally highlight the wrong parts.
The Hidden Layer of Every Image: Frequencies
Here’s the part most people don’t realize — every image has a secret second identity.
Besides being a bunch of pixels, an image can also be understood as a collection of frequencies. Just like music has deep bass, mid-tones, and high-pitched treble, images do too.
- Low frequencies represent the smooth parts — like the sky, soft shadows, or broad color areas.
- Mid frequencies capture textures — like the bark on a tree or patterns on a wall.
- High frequencies contain the sharp stuff — edges, outlines, and unfortunately… dust, structured noise, and grain.
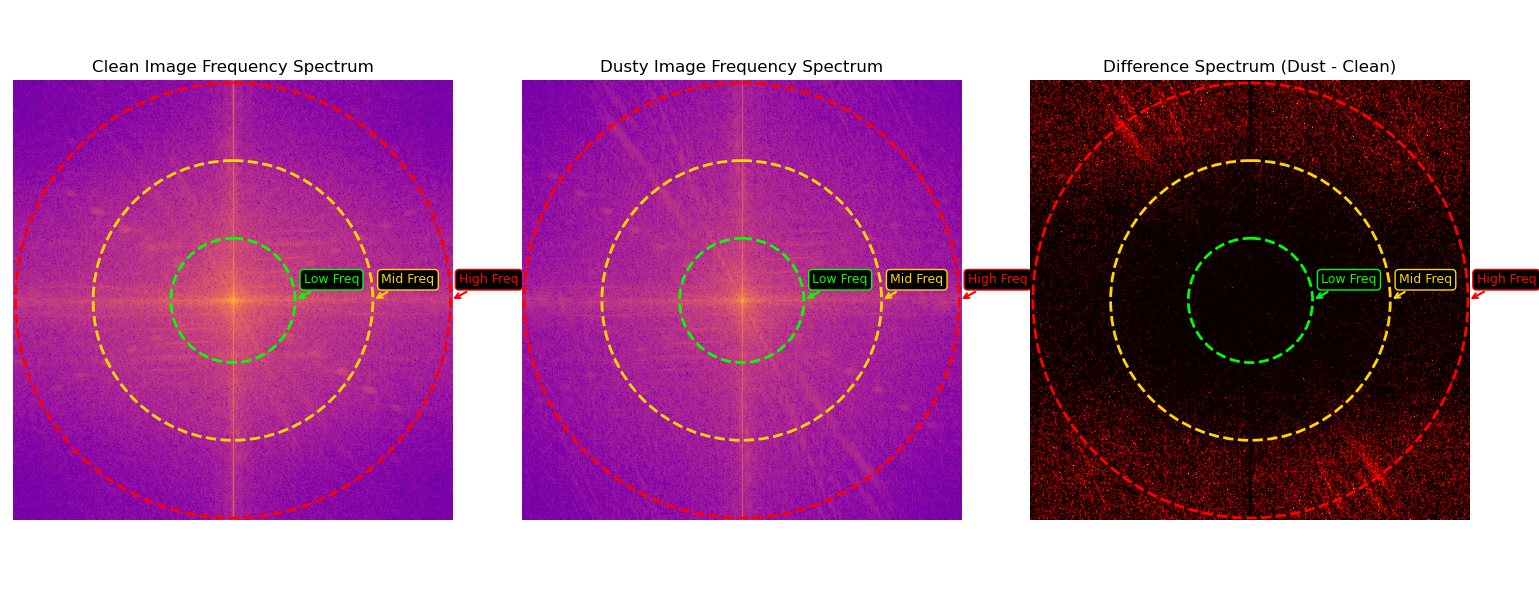
When we look at images in frequency space, patterns become easier to isolate.
Here’s the cool part:
While it’s hard to spot noise and detail in pixel form, they separate out more clearly in the frequency world.
So instead of guessing where the dust is, we let the image tell us directly through its frequencies.
How My Model Filters Out Dust — Before Paying Attention
Step 1: Break the Image into Frequency Bands
Imagine you’re trying to clean a large dusty windowpane. If you just run a cloth across the whole thing quickly, you’ll probably smear the dust around or miss stubborn spots. But if you go section by section — cleaning one square at a time — you can focus on what needs more effort and what’s already clean.
That’s exactly how my model works with the frequency spectrum. Instead of treating the whole image the same, it divides the spectrum into parts and carefully analyzes each one. This way, it doesn’t accidentally highlight dust or ignore important details.
Step 2: Find Out What’s Normal (And What Isn’t)
Now that the frequency data is sliced up, the model looks at each band and asks:
“What’s the usual pattern here?”
It does this by calculating two things:
- The average energy (μ) of that band — basically, what’s typical
- The variation (σ) — how much the values in that band fluctuate
Then it creates a threshold using this formula: \(T_{k} = \mu_{k} + \lambda\sigma_{k}\)
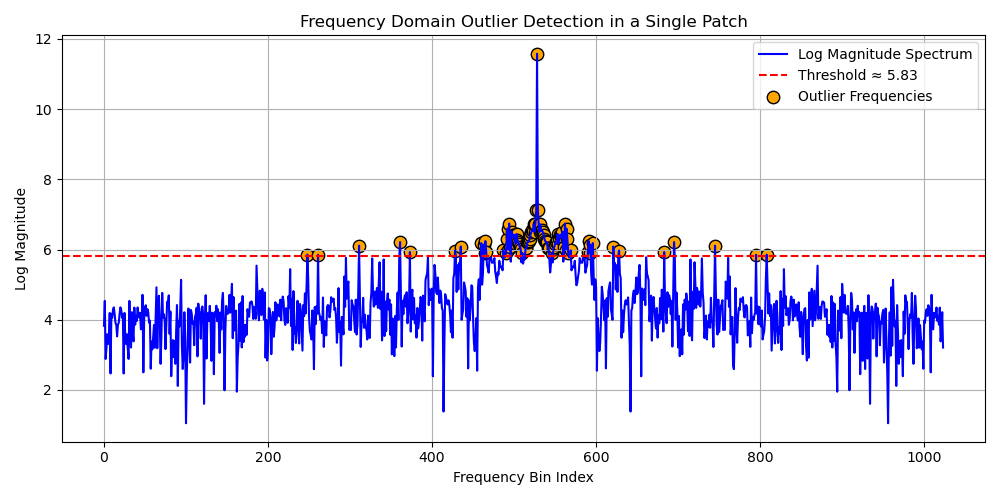
Anything far above the usual value in a band is considered suspicious — and possibly noise.
If a frequency is way above average, chances are it’s not part of the image — it’s dust or distortion.
The cool part? The model learns the sensitivity level (λ) on its own through training. So, it can adjust based on how messy or clean the image is.
Step 3: Suppress the Outliers
Next, the model goes through each frequency point in a band.
If the value is above the threshold, it’s treated as an outlier — likely caused by sand particles or grainy distortions.
Those are turned off or muted.
But if the value looks reasonable — below the threshold — it’s kept intact.
This step wipes out the most aggressive noise while preserving the meaningful content hiding underneath.
Step 4: Learn What’s Actually Useful
But not everything that survives the threshold is automatically valuable. So the model adds another smart step:
It applies learned weights to the remaining frequency values.
That means the model figures out which parts of the cleaned-up signal are actually important — and boosts them accordingly.
This allows it to:
- Emphasize edges
- Strengthen true texture
- Avoid over-emphasizing flat or dull areas
Step 5: Convert It Back into an Image
Once the model finishes cleaning and weighting all the frequency bands, it merges them together and uses an inverse transformation to turn the data back into a regular image.
Step 6: Now the Model Can Actually “Pay Attention”
After carefully filtering out sand-dust noise in the frequency domain and selectively boosting the important features, the model is ready for its final step: attention.
But this time, attention is not just blindly scanning the image.
It’s operating on a version of the image that’s already been:
- Cleaned of high-frequency dust noise
- Enhanced to bring out meaningful structure
- Balanced in terms of contrast and clarity
Now, attention can truly focus on what matters — the actual content of the image.
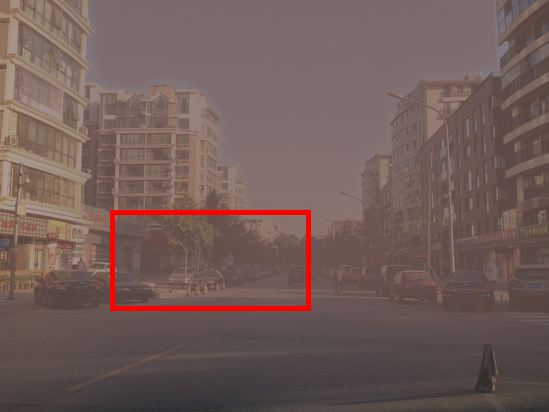
And here’s what that looks like:
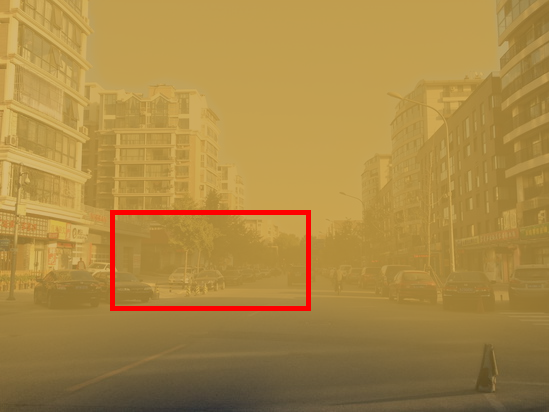
The original input is hazy, flat, and cluttered with fine dust patterns.
.png)
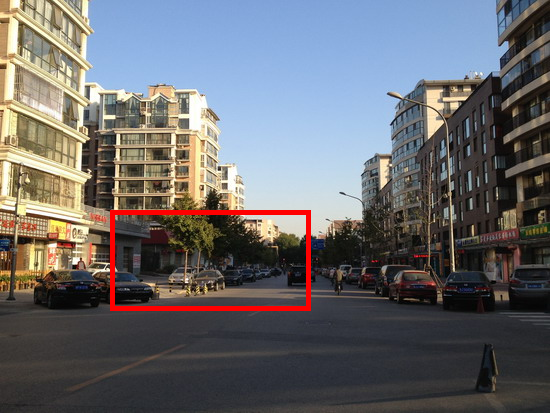
The restored image preserves structure and texture while removing the sand-dust interference.
The Bottom Line
By combining:
- Frequency-guided noise suppression
- Adaptive filtering and weighting
- Selective attention on refined features
…the model achieves a much smarter and robust restoration.
It’s not just guessing what’s behind the haze — it’s learning to see through it.
Whether it’s a city skyline or a distant mountain, this approach helps the model focus on reality, not the noise, and bring images closer to how they were meant to be seen.
Leave a Comment